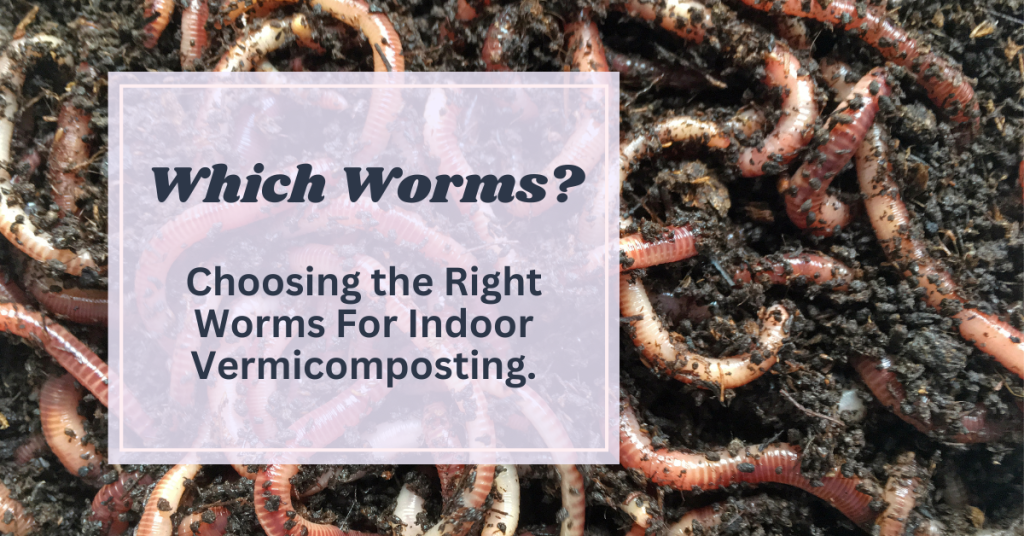
What Do Worm Castings Look Like When They’re Ready to Harvest?
Please note that this post may contain affiliate links, which means we may earn a commission if you make a purchase through our links, at no extra cost to you. Learn more.
If you’ve ventured into the world of vermicomposting, you’re probably eagerly anticipating the moment when you can harvest your first batch of worm castings.
Often referred to as “black gold” by gardening and vermiculture enthusiasts, worm castings are nature’s perfect fertilizer!
But how do you know when they’re ready to harvest, and what exactly should high-quality worm castings look like?
Worm castings, simply put, are worm poop. But don’t let that fool you – these tiny, nutrient-rich pellets are packed with beneficial microorganisms, enzymes, and minerals that can supercharge your garden.
Knowing when and how to harvest your worm castings is crucial for several reasons:
- Optimal Nutrient Content: Castings harvested at the right time contain the perfect balance of nutrients and beneficial microorganisms.
- Worm Health: Overharvesting or harvesting too early can stress your worm population and disrupt their environment.
- Bin Maintenance: Regular, timely harvesting prevents your bin from becoming overcrowded and maintains ideal conditions for your worms.
- Garden Benefits: Using mature, properly harvested castings ensures your plants receive the full spectrum of benefits that vermicompost offers.
In this guide, we’ll explore what worm castings should look like, how to tell when they’re ready for harvest, and common misconceptions that may have left you feeling confused.
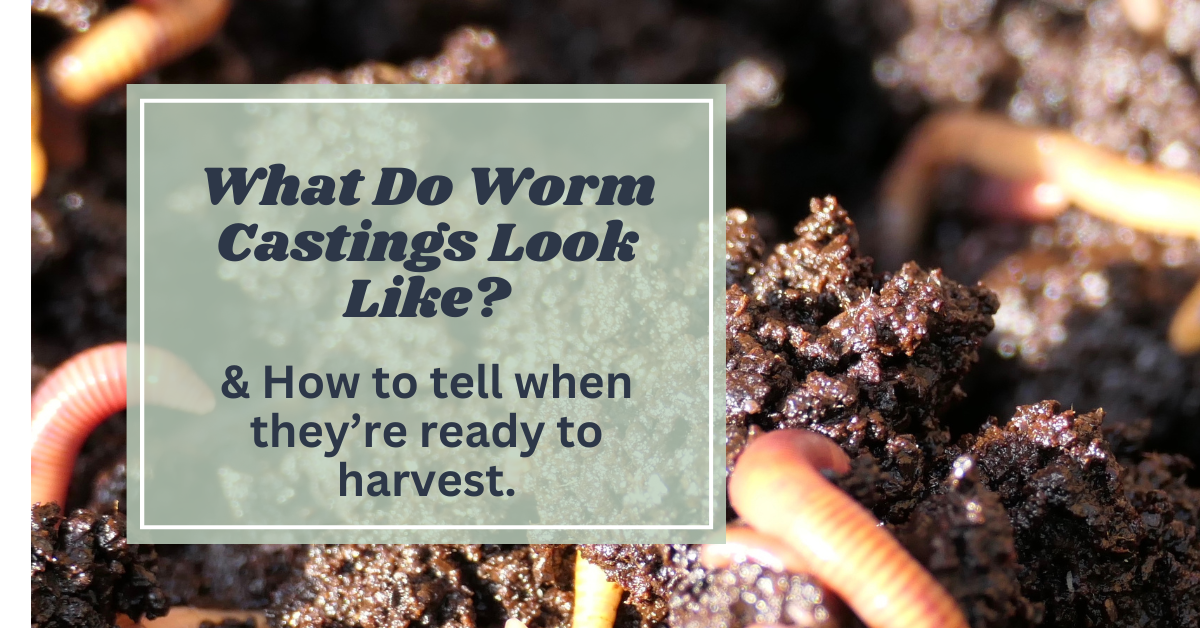
The Appearance of Worm Castings
Understanding what finished worm castings look like is crucial for knowing when to harvest them from your worm bin.
Here are the key characteristics to look for when it comes to healthy, ready-to-harvest castings:
Color
The color of mature worm castings is typically a rich, dark brown or black. This deep hue indicates that the organic material has been fully decomposed and transformed by the worms. If your castings appear too light or have a grayish tint, they may not be fully processed and could benefit from additional time in the bin.
Texture
Finished worm castings should have a fine, crumbly texture that resembles high-quality soil or peat. When you sift through them, they should break apart easily without large clumps or chunks of bedding material. A smooth, uniform texture indicates that the worms have thoroughly processed the organic matter.
Particle Size
Worm castings tend to be small and granular, with particles that are roughly the size of a grain of sand. If you notice larger pieces of unprocessed food scraps or bedding, it’s a sign that your castings may not be ready for harvest. Ideally, the castings should be consistent in size and appearance throughout the bin.
Moisture Content
Finished castings should feel slightly moist but not overly wet. When you grab a handful, they should hold together like a damp sponge but crumble easily when touched.
If your castings are too wet, it could lead to anaerobic conditions and unpleasant odors in your bin.
By familiarizing yourself with these casting characteristics, you’ll be better equipped to identify when your worm castings are ready for harvesting.
Signs Your Worm Castings Are Ready to Harvest
Knowing when to harvest your worm castings is as important as understanding what they look like.
Here is how to tell when your worm castings are ready for collection:
Time Frame
Generally, a worm bin takes about 3-6 months to produce harvestable castings. However, this can vary depending on factors such as bin size, worm population, and feeding rates.
Keep track of when you started your bin or last harvested to give you a general timeframe.
Visual Cues & Changes in Your Worm Bin
As you approach the harvest window, you’ll notice some visual changes in your bin:
- Diminishing Bedding: The original bedding materials (like shredded paper or cardboard) should be mostly gone, replaced by dark, soil-like castings.
- Uniform Appearance: The contents of the bin should look relatively uniform, without distinct layers of fresh food waste or bedding.
- Worm Concentration: You may see more worms congregating near the surface or sides of the bin, searching for fresh food sources.
Worm Behavior in the Bin
Observe your worms’ behavior for these signs:
- Reduced Activity: As food sources deplete, worm activity may slow down.
- Migration: Worms might start to migrate towards areas with fresher materials if you’ve been adding new bedding or food to one side.
Bedding Disappearance
One of the clearest signs that your castings are ready is when most of the original bedding has disappeared.
If you can barely recognize any of the materials you initially added to the bin, it’s likely that the worms have processed most of it into castings!
Overall Reduction in Bin Volume
When castings are ready for harvest, you should notice a significant reduction in the volume of material in your bin. Worm castings are more compact than the original organic matter, so your bin contents will shrink as the composting process progresses.
Remember, it’s better to wait a little longer than to harvest too early. Fully processed worm castings provide maximum benefits to your plants and garden soil.
How to Prepare Your Worm Bin for Harvesting
Proper preparation can make the harvesting process easier and ensure you get high-quality worm castings.
As you approach harvest time, keep an eye on:
Feeding Patterns
- Reduce Feeding: About 2-3 weeks before you plan to harvest, start reducing the amount of food you add to the bin. This encourages worms to finish processing existing materials.
- Targeted Feeding: If you’re using the migration method for harvesting, start adding food to only one side of the bin. This will encourage worms to move to that area, making it easier to separate them from the finished castings.
Moisture Management
- Optimal Moisture: Maintain proper moisture levels in your bin. The contents should feel like a wrung-out sponge – damp but not soaking wet.
- Drying Period: If your bin seems too wet, you can leave the lid off for a few days to allow excess moisture to evaporate (but watch out for escapees!). This makes the castings easier to handle during harvest.
Encouraging Worm Migration in Your Bin For Easier Harvesting
To make separating worms from castings easier, try these techniques:
- Light Exposure: Worms are sensitive to light. Remove the bin’s cover and expose the surface to light. The worms will burrow deeper into the bin.
- New Bedding Layer: Add a layer of fresh bedding material (like moist newspaper strips) on top of your existing bin contents. Many worms will move into this new layer over time.
- Food Lure: Place a small amount of their favorite foods (like melon rinds or coffee grounds) on one side of the bin. This can help concentrate worms in one area.
Pre-Harvest Observations
In the days leading up to your worm castings harvest:
- Visual Inspection: Regularly check your bin to confirm the signs of readiness we discussed in the previous section.
- pH Check: If you have pH testing strips, you can check the pH of your castings. Ideal worm castings have a neutral pH of around 7. (This is a cool step if you’re curious, but is by no means mandatory!)
- Odor Test: Your bin should have an earthy, pleasant smell. Any strong or unpleasant odors could indicate problems that need addressing before harvest, such as unprocessed materials or food still in the bin.
Common Misconceptions Worm Castings
As you become more familiar with vermicomposting, it’s important to be aware of some common misconceptions about worm castings.
These misunderstandings can lead to premature harvesting or misidentification of bin contents.
Let’s clear up some of these misconceptions:
Mistaking Partially Decomposed Material for Castings
One of the most common errors is confusing partially decomposed organic matter with finished worm castings.
- Appearance: Partially decomposed material may look dark and soil-like, but it often retains visible fragments of the original food scraps or bedding.
- Texture: It might be clumpier or more fibrous than true castings.
- Why it matters: Harvesting too early means you’re missing out on the full nutrient potential of your vermicompost.
Tip: If you can still identify bits of food or bedding, give your bin more time.
Confusing Worm Castings with Other Bin Contents
Your worm bin contains more than just castings.
Here are some items often mistaken for castings:
- Worm Cocoons
- Appearance: Small, lemon-shaped objects about the size of a grain of rice.
- Misconception: These are often mistaken for castings or unprocessed material.
- Reality: These are worm eggs and should be returned to the bin if found during harvesting.
- Unprocessed Bedding
- Appearance: Dark, moist clumps that may look like castings at first glance.
- Difference: When broken apart, you’ll see fibers or layers of the original bedding material.
- Worm Food in Various Stages of Decomposition
- Appearance: Can range from recognizable food scraps to dark, soil-like material.
- Difference: True castings will be more uniform in texture and appearance.
“Black Gold” – What if my worm castings aren’t black?
While worm castings are often referred to as “black gold,” this can be slightly misleading.
Healthy worm castings can have some colour variation, ranging from dark brown to black. Black worm castings are not necessarily “better” than dark brown ones.
Should Worm Castings Be Odorless?
- Misconception: Worm castings should be odorless.
- Reality: While castings shouldn’t smell bad, they do have a distinct earthy aroma.
A completely odorless bin might actually indicate low microbial activity!
Using Your Newly Harvested Worm Castings
Now that you’ve successfully harvested your worm castings, it’s time to put this “black gold” (or dark brown!) to use.
Worm castings are incredibly versatile and can benefit your plants in numerous way.
Immediate Use vs. Storage of Worm Castings
Before we dive into application methods, let’s consider the proper storage for worm castings:
- Immediate Use: Fresh castings are teeming with beneficial microorganisms and are ideal for immediate use. For people with small, at-home bins, using the harvested castings right away is probably your best bet!
- Storing Worm Castings: If you can’t use all your castings right away, store them in a cool, dark place in a breathable container (like a burlap sack). Avoid plastic bags, which can lead to anaerobic conditions.
- Shelf Life: Properly stored castings can last several months, but their microbial activity will gradually decrease over time.
Remember, your harvested worm castings are alive! So it’s always best to use them as soon as possible in order to preserve the most amount of microbial activity!
Basic Application Methods for Worm Castings
- As a Soil Amendment
- Mix 10-20% worm castings into your potting soil or garden beds.
- This improves soil structure, water retention, and provides slow-release nutrients.
- Top Dressing
- Sprinkle a thin layer (about 1/4 inch) of castings around the base of your plants.
- Gently work it into the top layer of soil.
- Seed Starting
- Add about 10% castings to your seed starting mix to give seedlings a nutrient boost.
- Transplanting Aid
- Add a handful of castings to planting holes when transplanting seedlings or mature plants.
How Frequently Should I Apply Worm Castings?
While worm castings are gentle and shouldn’t burn plants, it’s still best to use them sparingly:
- Houseplants: Use about 1 tablespoon per 6-inch pot every month.
- Garden Beds: Apply 1-2 inches as a top dressing once or twice a year.
- Lawns: Spread about 1/2 inch over your lawn in early spring or fall.
Of course, you’ll need to experiment with your own castings and plants to figure out the best application schedule for YOU!
Benefits of Using Worm Castings
After applying worm castings, you may notice:
- Improved plant growth and overall vigor
- Enhanced soil structure and water retention – improved drainage
- Increased resistance to pests and diseases
- Better nutrient uptake by plants
- Improved flavor in fruits and vegetables
Remember, worm castings are considered a slow-release fertilizer. While you may see some immediate benefits, the full effects often become more apparent over time as soil health improves.
Conclusion
As you gain experience with vermicomposting, you’ll develop a keen eye for recognizing the subtle signs that your castings are ready.
Don’t be afraid to experiment with different harvesting methods and trust your instincts! Worm bins are notoriously forgiving, and trial and error is just a part of the fun!
Happy harvesting!